Many PHP projects rely on a MySQL or MariaDB database. ExeOutput for PHP allows you to bundle a portable MariaDB server directly with your compiled application. This server is considered “portable” because it runs as a standard process and does not require installation as a Windows service. This is similar to a WAMP stack, but ExeOutput for PHP’s integrated browser and PHP runtime replace the need for a separate Apache web server.
Tip
Watch our video tutorial on configuring, using, and distributing the portable MySQL server with your app.
Separate Download Required
The portable MariaDB server is not included in the main ExeOutput for PHP installer. You must download it separately using the Web Update utility. In ExeOutput for PHP, click Check for updates to launch the utility, then select and install the “MySQL package for ExeOutput for PHP”.
After installation, the core server files are located in the MySQL\Source\mysql subfolder of your ExeOutput for PHP installation directory. You can update these files manually if needed.
Initial Server Setup #
Before setting up the server, you must first define your project’s Output Path.
ExeOutput for PHP will then copy the necessary server files into a MySQL subfolder within your specified output directory. During this setup, you will be prompted to configure the root password and the connection port (default is 3306).
After you provide these details, the server files are copied, and the server is started temporarily to apply the configuration. Once configured, the server is shut down and is ready to be used by your application.
Distribution
The MySQL folder is required for the application to function and must be distributed alongside your .exe file. When creating an installer for your application (for example, with Paquet Builder), ensure you include this entire folder.
Changing the Password
Do not change the root password by manually editing configuration files. ExeOutput for PHP stores this password internally to manage the server shutdown process. To change the password, you must repeat the initial setup process.
You can view the configured credentials and port at any time by clicking the Show Configured Username and Password and Show Configured Port links in the ExeOutput for PHP interface.
Database Management with AdminNeo #
To manage your databases, you need a MySQL client. ExeOutput for PHP offers integration with AdminNeo, a popular database management tool.
ExeOutput for PHP provides a pre-compiled, standalone version of AdminNeo called AdminNeo EXE. From the ExeOutput for PHP interface, you can launch AdminNeo EXE to manage your project’s portable database. This action temporarily places AdminNeo EXE next to your application’s output .exe, starts your portable MySQL server, and then runs AdminNeo. When you close AdminNeo, the MySQL server is automatically shut down.
Connecting with AdminNeo #
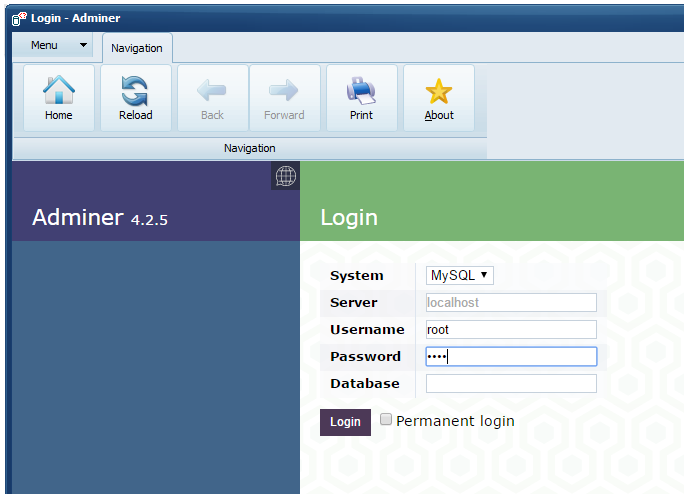
- Server:
localhost. If you used a custom port, enter it in the formatlocalhost:PORT(e.g.,localhost:3307). - Username:
root - Password: The password you configured during the initial setup.
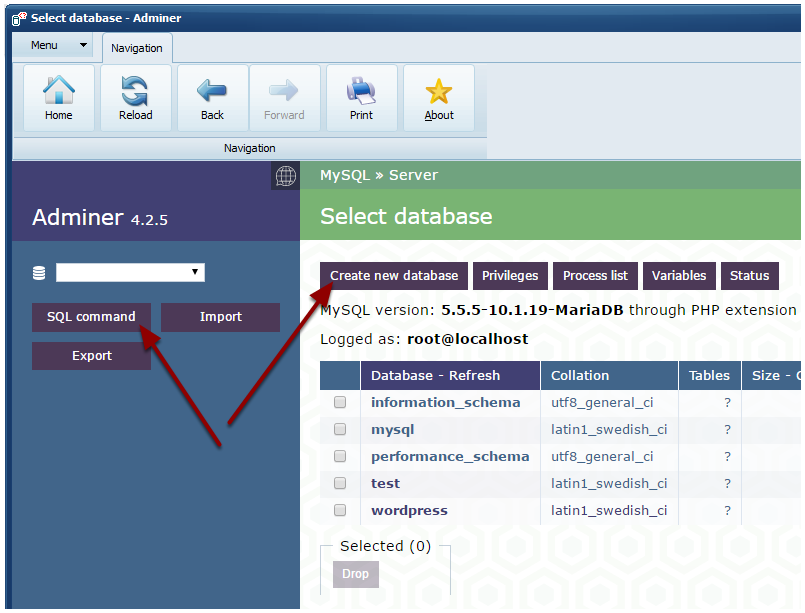
Once connected, you can create new databases, execute SQL commands, import data, and perform other management tasks.
AdminNeo EXE is a development tool and should not be distributed with your final application.
AdminNeo EXE Download
Like the MariaDB package, AdminNeo EXE must be downloaded separately via the Web Update utility.
Application Integration #
To connect your PHP code to the database, follow these steps:
- Enable the
MySQLiPHP extension on the PHP Extensions page. - On the MySQL Server page, check the option Start and stop the MySQL server automatically. This ensures the database server runs alongside your application.
- The MySQL server may take a few seconds to initialize. If your application tries to connect immediately at startup, it may fail. To prevent this, you can configure a startup delay using the Delay to wait for the server to start (in seconds) option. This forces your application to wait before displaying its main window, giving the server time to become ready.
If the server fails to start, a customizable error message is displayed. You can edit this message on the Localization page.
Single Instance
Only one instance of the portable server can run at a time. It is highly recommended to also limit your application to a single instance.
Removing the MySQL Server #
To decouple the server from your application, uncheck Start and stop the MySQL server automatically in your project settings. You can then safely delete the MySQL subfolder from your application’s output directory.
Viewing Server Logs #
The MySQL server maintains a detailed log file, which is essential for troubleshooting. To view it, click the Open server log link in the ExeOutput for PHP interface.
WordPress Demo #
To see a complex, real-world example, check out our demonstration project where we compiled the entire WordPress platform into a portable desktop application. The sample includes the full source code and a step-by-step tutorial.


