ExeOutput for PHP
  • Discover
    Homepage
    Our Latest News and Articles

    Keep up-to-date with the latest developments, insightful articles.

    Why a PHP Compiler?

    Reasons for using our PHP compiler ExeOutput for PHP.

    Screenshots

    Get a visual tour of our software through various screenshots.

    Video and Screencasts

    Access a range of video content, from detailed tutorials to product demos.

  • Feature Tour
    All-in-one PHP to EXE Compiler
    Use PHP power to create Windows apps
    Full HTML5, JavaScript and CSS3 Support
    Make GUI And Console Apps with PHP
  • Downloads
    Get ExeOutput for PHP

    Download the installer of our PHP to EXE compiler

    PHP App Examples

    Download sample apps made with ExeOutput for PHP

    WordPress Desktop App

    Download the stand-alone WordPress app sample

  • Buy Now
  • Learn
    Documentation

    Full online documentation of ExeOutput for PHP

    PHP App Samples

    Example projects made with ExeOutput for PHP for various cases

    ChangeLog

    Version history and releases of ExeOutput for PHP

    Privacy Policy

    See our Privacy Policy for ExeOutput for PHP

    About Us

    More information about G.D.G. Software

  • Support
    Contact Us

    Contact our staff or open a support ticket

    Newsletter

    Stay Updated: subscribe to our newsletter

    Frequently Asked Questions

    Find your answer directly in our FAQ

    Support Center

    Get direct support for ExeOutput for PHP

    Affiliate Program

    Join our affiliate program to promote ExeOutput and earn money

    Community Forum

    Visit our support forum and ask your questions

Try For Free
My Account

Getting Started

11
  • Welcome to ExeOutput for PHP
  • Getting Started
  • Starting a New Project
  • Advice for Getting Started with PHP Applications
  • How to Compile Your Project
  • How Compiled PHP GUI Applications Work
  • How Compiled PHP Console Applications (CLI) Work
  • Using PHP Frameworks
  • Visual C++ Redistributable Requirement
  • Application Command Line Switches
  • PHP Samples

Working With PHP

12
  • Working with PHP
  • Choose a PHP Version
  • Accessing Files in Compiled PHP Applications
  • Saving Files with PHP in Desktop Applications
  • Solving PHP Errors
  • Using the Save As Dialog Box in PHP Applications
  • Selecting Local Files with PHP (File Upload Replacement)
  • Built-In ExeOutput for PHP Functions
  • About PHP Sessions and Cookies
  • Global Variables
  • Using the cURL Extension
  • Using exec(), system() in Applications

Databases

4
  • Using Databases in Applications
  • MySQL and MariaDB Support
  • Using a Portable MySQL (MariaDB) Server
  • How to Check MySQL Server Connection

JavaScript And Browser

14
  • JavaScript and the Chromium Browser
  • Developer Tools in ExeOutput Applications
  • The exeoutput JavaScript Object API
  • JavaScript window extension
  • Special Protocols for Links
  • HTML5 and CSS3 Support
  • Using HTML5 Video and Audio
  • Print, Kiosk Printing, and PDF
  • Opening New Windows
  • JavaScript window extension
  • Using Flash Objects (SWF) in Compiled Applications
  • Adding Custom Headers to Requests
  • How to Configure Proxy for Your App
  • HTTP Basic Authentication

File Manager

4
  • File Manager
  • File Properties Editor
  • About External Files
  • Internal Code Editor

Application Settings

9
  • Choosing and Configuring the Rendering Engine
  • Chromium Embedded Framework (CEF) Settings
  • WebView2 Rendering Engine Settings
  • Main Window Settings
  • UI Skin Properties
  • Application Components
  • Language and Localization
  • Startup and Exit Messages
  • Application Settings – Dialog Boxes

PHP Settings

7
  • PHP Settings – Main Settings
  • PHP Settings – PHP Extensions
  • PHP.ini Settings
  • PHP Settings – String Protection
  • PHP Settings – PHP Debugging
  • PHP Settings – External HTTP Server
  • Redirection and Routing

User Interface

13
  • User Interface Components
  • User Interface Editor
  • UI Control Actions
  • How to Modify Controls at Runtime
  • Status Bar Properties
  • Printer Properties
  • Tray Icon Properties
  • Context Menu Properties
  • Creating a Ribbon for Your Application
  • Toolbars in Your PHP Application
  • Menu Bar in your PHP application
  • Adding an Image or Logo to the UI
  • Using Timers and Cron Jobs in Your Application

Security

4
  • Security – Global Protection
  • Security – PHP Protection
  • Security – Code Signing (Digital Signatures)
  • Security – Licensing

Application Output

5
  • Application Output Settings
  • Output – Deployment Options
  • Application Loading Screens
  • Output – EXE Icon and Version Information
  • Output – Creating Installers or Zip Archives

Scripting with HEScript

9
  • Introduction to Scripting with HEScript
  • The HEScript Editor
  • Adding HEScript Code to Your Application
  • Script Templates
  • Running and Calling HEScript Procedures/Functions
  • HEScript Function Reference
  • How to Run an Executable Program
  • How to Prompt a User for Their Name Once and Store It
  • How to Call DLL Functions

Additional Information

6
  • Environment Options
  • Technical Notes Regarding Applications
  • Cloning a Project
  • Command Line Options
  • Contact Information
  • About this documentation
View Categories
  • Home
  • ExeOutput for PHP Help
  • Getting Started
  • Starting a New Project

Starting a New Project

1 min read

ExeOutput for PHP stores all application settings in a project file (extension: .exop). You can open and save project files at any time using the Load and Save buttons in the toolbar. But first, let’s create a new project.

To begin, select Start a New Project at startup or click New in the toolbar. This will open the New Application Wizard:

New project wizard

The wizard will guide you through the initial project setup.

Step 1: Select the Source Folder #

The source folder should contain all of your website’s files: PHP scripts, HTML pages, images, CSS, JavaScript, etc. ExeOutput for PHP treats this folder as the application’s root directory. All files within this folder and its subdirectories are automatically added to the project. You can add or remove files later using the File Manager.

Directory Structure is Preserved

Your website’s directory structure is preserved within the application. The source folder becomes the application’s root, and relative paths between your files will continue to work just as they do on a web server. Think of the compiled application as a self-contained web server.

Step 2: Choose the Index Page #

The index page is the first page users see when they launch your application; it acts as the home page. The wizard lists all files from your source folder, allowing you to select the desired index page. You can select a file within a subfolder.

Click Continue to proceed.

Step 3: Select the Application Type #

ExeOutput for PHP can create two types of applications:

  • Graphical User Interface (GUI): A standard windowed application. You will need to select a default theme for your GUI, which you can change later.

    GUI application with a ribbon

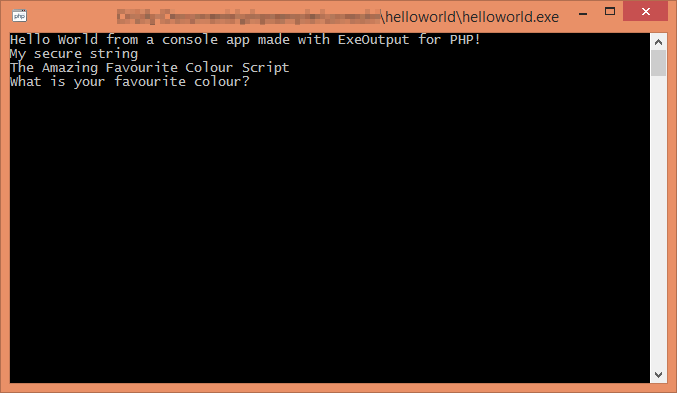
  • Command-Line Interface (CLI): A console application that runs without a graphical interface. When launched, it operates within the standard Windows console and executes the PHP script you selected as the index page.

    CLI app

Step 4: Define Output Settings #

This is the final step:

  1. Application Path: Specify the full path for the output .exe file, including the filename. It is strongly recommended to save the .exe file in a directory separate from your source folder.
  2. Application Title: Enter the title for your application. This will appear in window title bars, dialog boxes, and the Windows taskbar.

Warning

If your title contains a double-quote ("), you must escape it by doubling it ("") to prevent script compilation errors.

Click Finish to create the project. ExeOutput for PHP will then create the project file, configure default settings, and import all of your source files. This process may take a few moments, depending on the number of files.

Project Created

Once complete, you will be taken to the Main Window settings. Your project is now ready to be configured further or compiled immediately.

Next Steps #

  • How to compile your project
  • Advice for getting started
  • Working with PHP Frameworks

What are your Feelings

  • Happy
  • Normal
  • Sad

Share This Article :

  • Facebook
  • X
  • LinkedIn
  • Pinterest
Getting StartedAdvice for Getting Started with PHP Applications

Leave a Reply Cancel reply

Your email address will not be published. Required fields are marked *


Table of Contents
  • Step 1: Select the Source Folder
  • Step 2: Choose the Index Page
  • Step 3: Select the Application Type
  • Step 4: Define Output Settings
    • Next Steps
ExeOutput for PHP to EXE compiler

PHP to EXE App Compiler
© G.D.G. Software 2025

X-twitter Youtube
Software
  • Home
  • Feature Tour
  • Screenshots
  • Video and Screencasts
  • Home
  • Feature Tour
  • Screenshots
  • Video and Screencasts
Get
  • Download
  • Buy Now
  • PHP App Samples
  • My Account
  • Download
  • Buy Now
  • PHP App Samples
  • My Account
Connect
  • Latest News
  • Newsletter
  • Forum
  • Affiliate Program
  • Support Center
  • Latest News
  • Newsletter
  • Forum
  • Affiliate Program
  • Support Center
QUESTIONS?
  • Contact Us
  • FAQ
  • Documentation
  • Privacy Policy
  • About Us
  • Contact Us
  • FAQ
  • Documentation
  • Privacy Policy
  • About Us
Manage Consent
To provide the best experiences, we use technologies like cookies to store and/or access device information. Consenting to these technologies will allow us to process data such as browsing behavior or unique IDs on this site. Not consenting or withdrawing consent, may adversely affect certain features and functions.
Functional Always active
The technical storage or access is strictly necessary for the legitimate purpose of enabling the use of a specific service explicitly requested by the subscriber or user, or for the sole purpose of carrying out the transmission of a communication over an electronic communications network.
Preferences
The technical storage or access is necessary for the legitimate purpose of storing preferences that are not requested by the subscriber or user.
Statistics
The technical storage or access that is used exclusively for statistical purposes. The technical storage or access that is used exclusively for anonymous statistical purposes. Without a subpoena, voluntary compliance on the part of your Internet Service Provider, or additional records from a third party, information stored or retrieved for this purpose alone cannot usually be used to identify you.
Marketing
The technical storage or access is required to create user profiles to send advertising, or to track the user on a website or across several websites for similar marketing purposes.
  • Manage options
  • Manage services
  • Manage {vendor_count} vendors
  • Read more about these purposes
View preferences
  • {title}
  • {title}
  • {title}